
Jennifer Greene Sullivan
April 16, 2018
How do you prepare to hatch chicken eggs?
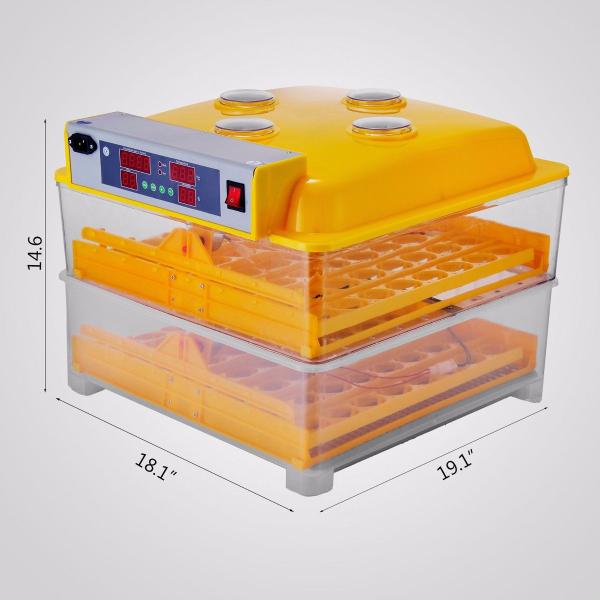
My husband is always eager to go to the SALE; most of the time, he doesn’t even let me know what he’s planning on purchasing. The first time I went with him to the SALE in Gray, Georgia, his first purchase was an incubator that turns 96 eggs at a time. I assumed that was an ever so slight hint that I was free to learn about incubating my eggs.
So, I began researching some topics like: how do I use our incubator? how do I prepare the eggs for incubation? how do I ensure eggs are developing? First, I learned that our incubator automatically turns the eggs every 60 minutes.
-
-
Best Choice Products 96 Digital Clear Egg Incubator Hatcher Automatic Egg Turning Temperature Control
The turning ensures that the chicks adequately develops and do not adhere to the sides of the egg membranes. The incubator keeps the eggs at a constant temperature of 100 degrees Fahrenheit as well as constant humidity levels needed to promote proper development for the twenty one day incubation period. Our incubator that is pictured above will alarm if the humidity drops below 41 percent or the temperature drops below 37.8 degrees Celsius.
When I hear the alarm, I can add water or change the setting for the temperature so that the eggs have proper incubation conditions. A chicken egg takes 21 days to hatch. A turkey egg takes 28 days to hatch whereas a duck egg takes 35 days. I only had to add water one time during the 21 day period, and it’s important that the last three days has a humidity percentage of 50 or higher.
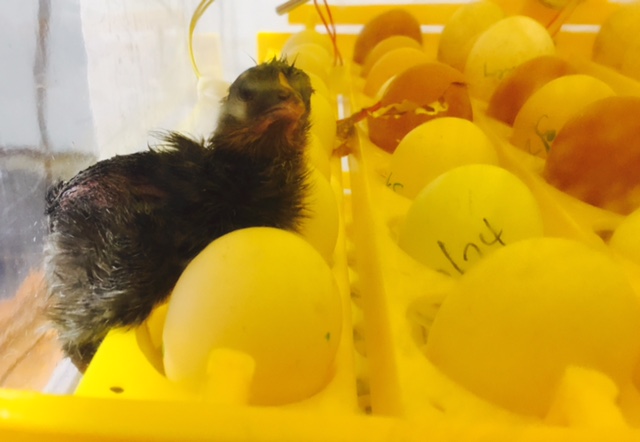
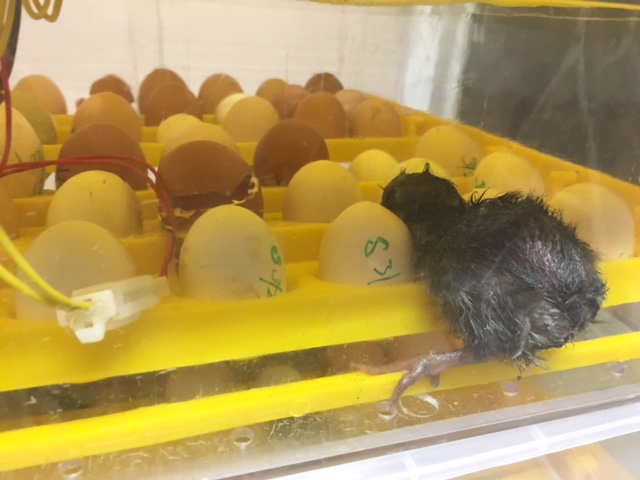
This Saturday was HATCH DAY!! Inside our incubator, I placed barnyard mixed chicken eggs inside the top tray on 3.24 and 3.25. On the bottom tray, I placed turkey eggs and silver sebright eggs that were dated 3.30.18. I had one Mille Fleur with the most handsome feathered feet, several Marans and Buffs. The last two eggs to hatch were my Americaunas.
-
March 24, 2018 Hatchling
The children, Chris, and I awoke Saturday morning to the chirping and peeping of freshly hatched chicks. These chicks were then placed in our brooder with Ernest the turkey and the two Maran chicks that the FFA students hatched last week. As Saturday and Sunday progressed, we had twenty biddies. They were placed inside our brooder. The brooder is a cow trough with a heat lamp, pine shavings, water, and chick starter feed. The brooder is inside our shed that eliminates the possibility for drafts or predators. This post will be followed by how to properly brood chicks by weekly milestones.
-
Notice the labels I wrote on the eggs helped me keep track of hatch day.

